If you have a UPS dedicated to your Ubuntu workstation, Ubuntu “Power Management” can meet your requirements. See details in this post.
If you have an APC UPS, another option is to use apcupsd, which is a more advanced tool to manage your APC UPS.
UPS protects the computer from (usually instantaneous, but often dangerous) surge of electricity, just connecting computer with the UPS (usually with USB connection). apcupsd is an Open Source software with excellent documentation which additionally can
- gracefully shut down your computer some minutes after power outage
- can force computer restart when the power returns (if AC back function supported by computer BIOS)
You may use command line interface or Web interface or graphical interface (gapcmon) to monitor your UPS.
The model of the APC UPS used in this tutorial is “APC Back UPS BR1500GI RS 1500VA (LI)”.
Installation
Open a terminal and type
1 |
|
(For information on how to install software without using command line, see this post).
After installation, directory /etc/apcupsd contains:
- configuration files
- apcupsd.conf the MAIN configuration file
- hosts.conf other computers supported by the same UPS (NIS network driver for slaves)
- multimon.conf parameters to display in web interface
- executable files
- apccontrol here you will find the various events, which apcupsd can manage (power outage etc.). If you want o make changes, DO NOT modify this file directly, but create a script with the name of an event and place it in /etc/apcupsd (eg a custom script /etc/apcupsd/doshutdown will be executed first when the doshutdown event enabled).
- changeme sends email to change the UPS battery
- commfailure sends email when connection with the UPS is lost
- commok sends email when connection with the UPS is established
- offbattery sends email when your computer runs on power
- onbattery sends email when your computer runs on battery (UPS)
- executable files (Debian specific)
- ups-monitor Debian creates the symbolic link
/etc/init.d/ups-monitor →
/etc/apcupsd/ups-monitor. So, Debian halt script
(/etc/init.d/halt) executes it. In this way, it kills
power in the UPS (
/etc/apcupsd/apccontrol -killpower) after the shutdown of the system (if there is the file /etc/apcupsd/powerfail, which is then deleted) - killpower any actions that need to be executed before power interruption in the UPS (apcupsd -killpower)
- ups-monitor Debian creates the symbolic link
/etc/init.d/ups-monitor →
/etc/apcupsd/ups-monitor. So, Debian halt script
(/etc/init.d/halt) executes it. In this way, it kills
power in the UPS (
- temporary files
- powerfail “Flag file” created by apcupsd before shutdown the system, in order to inform the halt script that the shutdown is due to power outage (power fail)
Concerning the executables which send email
If you want this email functionality, you have to install a message transfer agent (MTA). A lightweight option would be exim
1 |
|
Additionally, you have to forward root mail to your email, as apcupsd sends email to sysadmin by default.
See this post for details.
Concerning the UPS “killpower”
The power supply interruption in USB UPS will be done 60 sec after the shutdown of the computer. Otherwise, you have to make changes in the EEPROM of the UPS (not recommended).
Configuration
STEP 1 – Edit main configuration file
First, create a backup of main configuration file:
1 |
|
Using your favorite text editor (nano in my case):
1 |
|
Find and edit
- UPSCABLE, UPSTYPE, DEVICE
- and optionally BATTERYLEVEL and MINUTES
In most models, the following changes are enough.
1 2 3 4 5 6 7 8 9 10 11 12 13 14 15 16 17 18 19 20 21 22 23 24 25 26 27 28 29 30 31 32 |
|
STEP 2 – Edit /etc/default/apcupsd
Using your favorite text editor (nano in my case):
1 |
|
set:
STEP 3 – Finally, restart apcupsd
Open a terminal and type:
1 |
|
View logs
To view apcupsd logs, open a terminal and type:
1 |
|
Command line interface
To get information about your UPS status, use the command:
So, in my workstation (named “athena”) the output is:
1 2 3 4 5 6 7 8 9 10 11 12 13 14 15 16 17 18 19 20 21 22 23 24 25 26 27 28 29 30 31 32 33 34 35 36 37 |
|
Web interface
apcupsd offers a handy web interface to monitor your UPS. To install it, open a terminal and type
1 |
|
Of course, a web server is needed to use the web interface. For example, to install Apache (if not installed):
1 |
|
To access web interface, point your browser to
http://localhost/cgi-bin/apcupsd/multimon.cgi
Here is the main page:
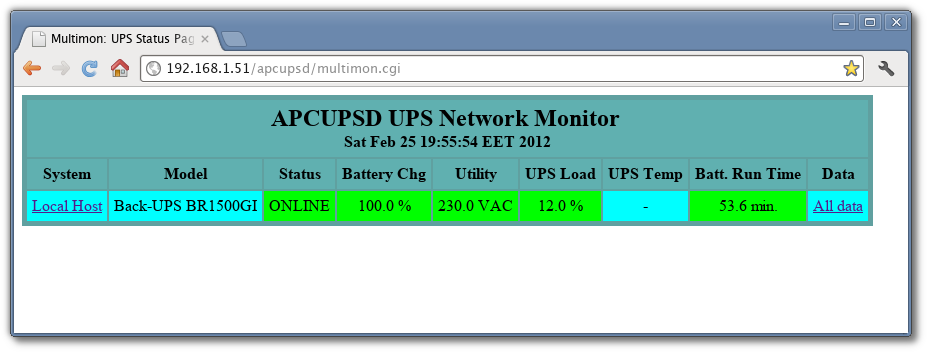
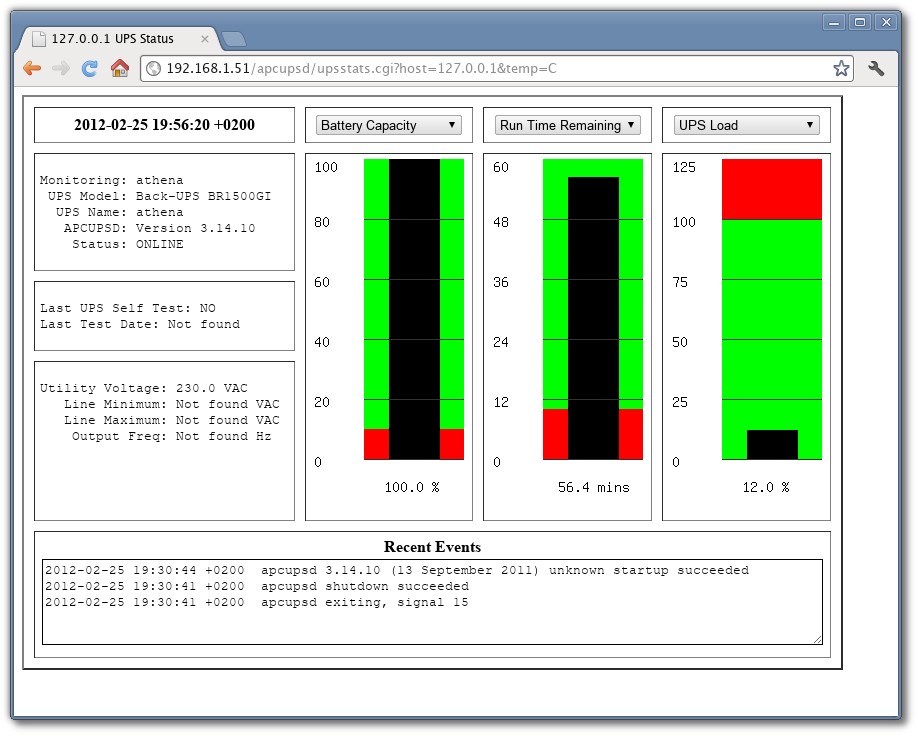
To get details, click the “Local host” link
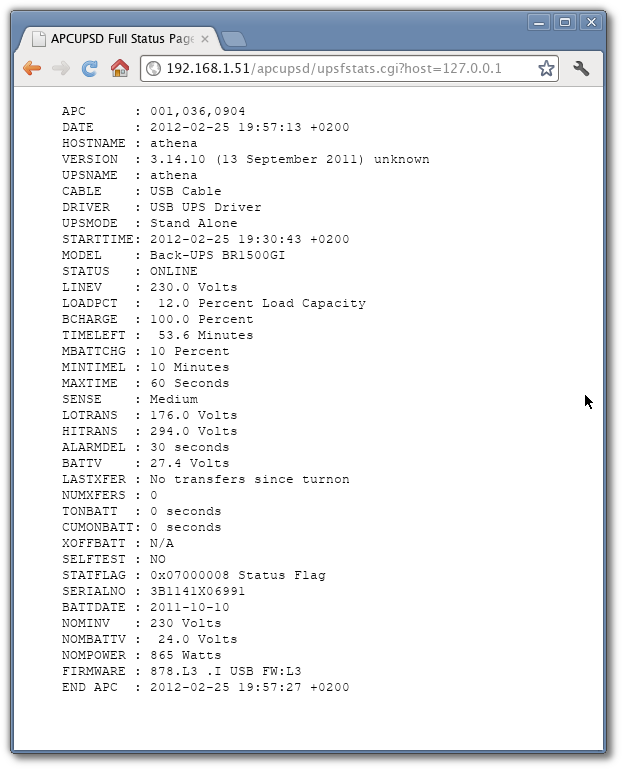
The “All data” link is similar to apcaccess
output
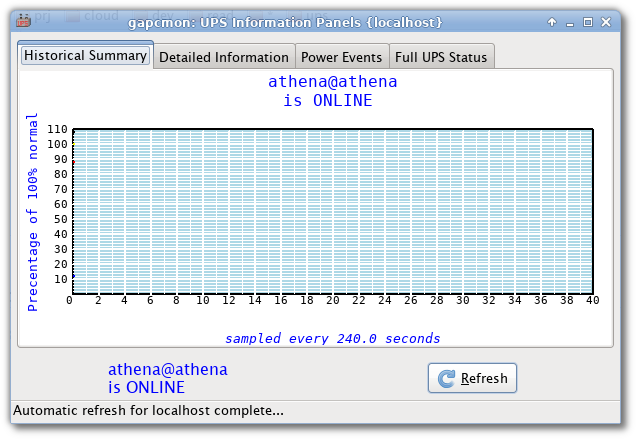
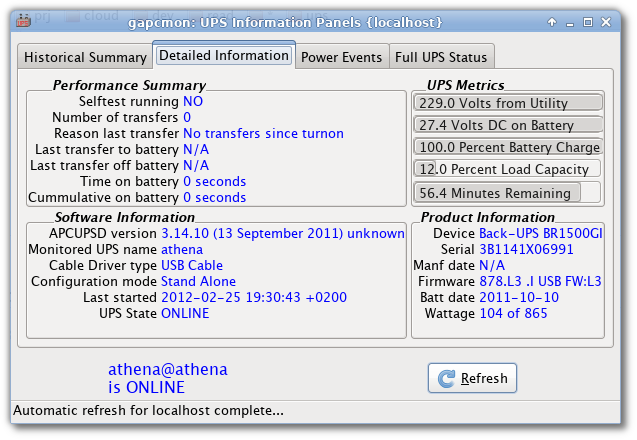
Graphical interface (gapcmon)
Unfortunately gapcmon is not yet available for latest Ubuntu versions (as Xenial 16.04 etc). See here for details.
However, this is how the main screen looks like:
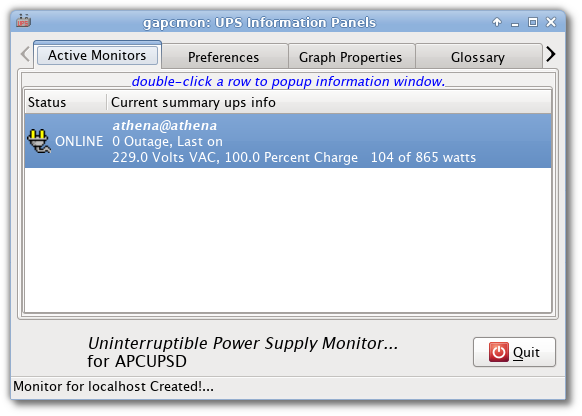
The Historical Summary section
The Detailed information section
Test your UPS
STEP 1
Modify the TIMEOUT parameter from 0 to 60 to force the computer shutdown after 60 sec from power failure, rather than running on battery until the battery is empty.
1 |
|
Restart apcupsd service:
1 |
|
STEP 2
Disconnect power from the UPS. Your computer should be shut down in 60 seconds.
STEP 3
Reset TIMEOUT parameter
1 |
|
Restart apcupsd service:
1 |
|

Entrepreneur | Full-stack developer | Founder of MediSign Ltd. I have over 15 years of professional experience designing and developing web applications. I am also very experienced in managing (web) projects.
